Victorian Haunted House…
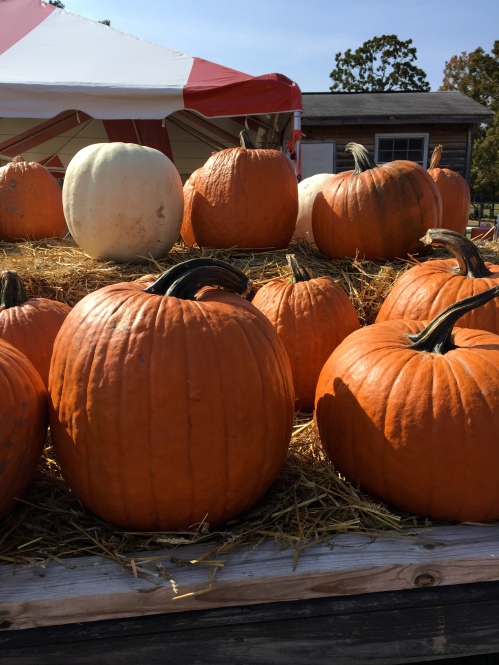
If you’re noticing the countryside where you live, I bet it’s dotted with pumpkin stands, corn mazes, and haunted houses. It certainly is here in the South and my project reflects one of my fondest memories–a haunted house.
Our daughters were five and seven when we went to a haunted house as a family. Thinking back, it might not have been the best idea with small children, but they wanted to go, so we did. However, at the front door we were greeted by the scariest ghoul and Kelly literally jumped into my arms, buried her head in my chest and remained there until the end!
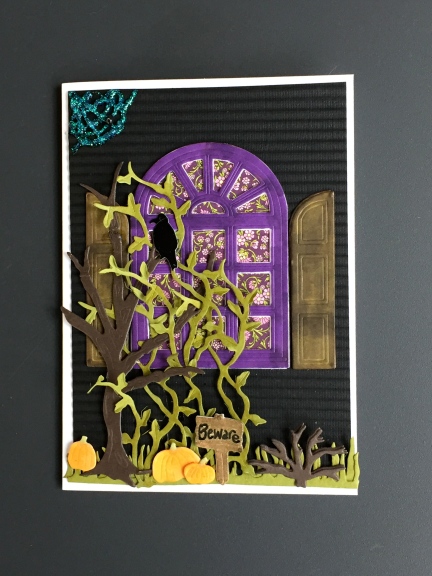
During the daytime, these houses look as if they’ve been forgotten, but at night, well, you get the picture from my card. I used my CountryScape dies to recreate a charming Victorian, neglected by time, but still has that curiosity factor to entice you in~eek!
Let’s get started…
Step 1:
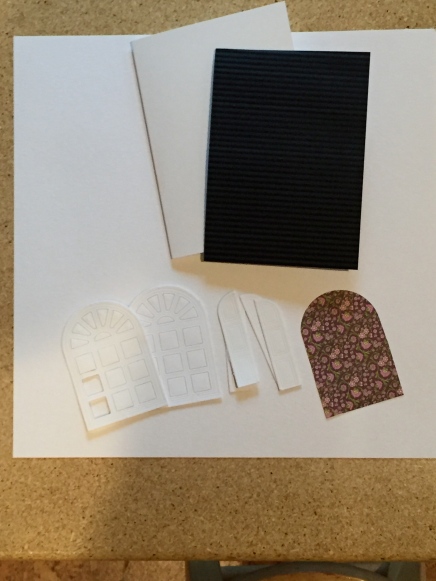
I made an A6 card–6 1/4” x 4 1/2” from 100lb. white cardstock. I cut a 6” x 4 1/4” rectangle from 80lb black carstock and ran it through my crimper to give the effect of clapboard. From 100lb Soft-finish cardstock, with Clear Double Sided Adhesive Tape on the back, die cut two Carolina Windows/Shutters. Also die cut: Apple Tree with branches and Azalea bush from 100lb dark brown cardstock, Crow from 80lb glossy black cardstock, pumpkins and sign from 100lb white cardstock, and Clematis vine (3x’s) and grass (2x’s) from 80lb medium green cardstock and a 2 1/4” x 3 1/4” tag (Tags & More 6) from a background paper.
Click here for a helpful video tutorial on ‘How to Die Cut’
Click here for a helpful video tutorial on Clear Double Sided Adhesive Tape
Step 2:
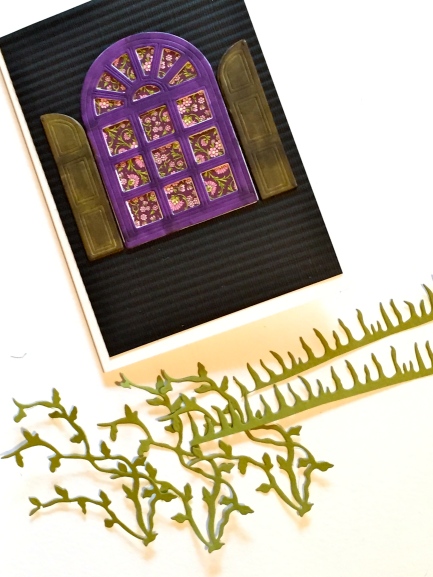
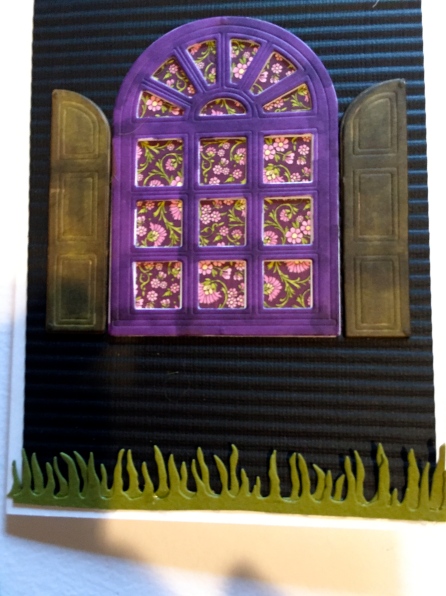
Assemble the card, adhering the crimped rectangle with double sided tape. Color the window and shutters with Copic markers in your preferred colors. Adhere two windows, then, adhere the tag on the wrong side of window (makes it look like wallpaper) and finally, the shutters together.
Step 3:
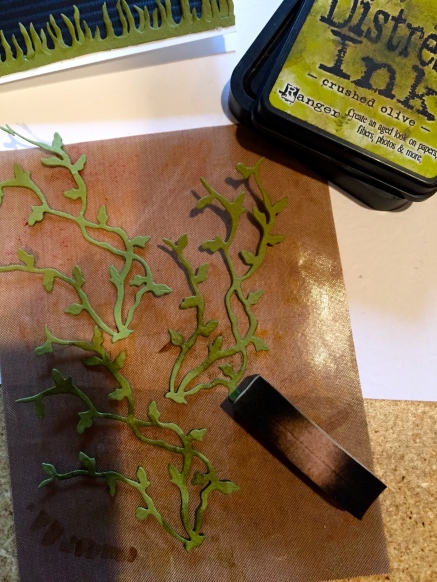
Place grass pieces and vines on a nonstick mat and dab with Distress Ink/Crushed Olive. Glue the grasses to the bottom of the card along the black layer. Place Clematis vines on the Leaf Pad and use the Leaf Tool to add stem lines on each of the leaves. Use small tweezers to pinch together to give dimension to the leaves.
Click here for a helpful video on Susan’s Garden Club – Tools & Techniques
Click here for a helpful video on Susan’s Garden Club – CountryScapes – Mini Botanicals
Step 4:
Use Beacon’s Zip Dry to adhere the vines to the house, leaving some of the vine area open to stand out. Adhere the tree by the vines, weaving some of the loose vines around the tree. Set crow in place on one of the branches.
Step 5:
Use Copic markers to color the pumpkins and sign. Print “Beware” on the sign with a black Uni-Ball pen. Finally, use Viva Decor/Halogram Paper Pen to make a spider web up in the left-hand corner and a dot of Viva Decor/Black Paper Pen for a spider.
Step 6:
Supplies:
Elizabeth Craft Designs:
Susan’s Garden Club – CountryScapes – Carolina Window & Shutters (1086)
Susan’s Garden Club – CountryScapes – (pumpkins) Flora 4 (1083)
Susan’s Garden Club – CountryScapes – (assembled tree & sign) Backyard 3 (1078)
Susan’s Garden Club – CountryScapes – (crow) Country Critters 1 (989)
Susan’s Garden Club – CountryScapes Mini Botanicals – Clematis , Ivy (1036)
Susan’s Garden Club – CountryScapes Mini Botanicals – Rhododendron, Azalea, Primrose (1035)
Susan’s Garden Club – CountryScapes – Clouds & Grass (1094)
Susan’s Garden Club – Tool Set (808)
Susan’s Garden Club – Leaf Pad (811)
Els van de Burgt Studio – Tags & More Daisy (959)
Soft Finish Cardstock – 100lb. (PSF102)
Clear Double Sided Adhesive Tape
Other:
Ranger Distress Ink (Crushed Olive)
Viva Decor (Halogram Pen)
Copic Markers
Helpful Videos:
Click here for a helpful video tutorial on ‘How to Die Cut’
Click here for a helpful video on Susan’s Garden Club – Tools & Techniques
Click here for a helpful video on Susan’s Garden Club – CountryScapes – Mini Botanicals
Click here for a helpful video on Clear Double Sided Adhesive Tape



Great card, Susan, and I always love the stories that you include with your projects.
Happy Halloween! Love your card